In this Article
2. Import the monthly solution package
4. Configure the Sales Hub app
6. Troubleshooting and escalation
Purpose and outcomes
Purpose: Provide a repeatable process for importing the monthly D365/Power Apps solution package, applying CSM-provided environment-variable values, and exposing the Co-sell Dataverse table in the Sales Hub app.
Process owner | Application Administrator / Deployment Engineer |
Package cadence | Monthly — developer provides a new solution package |
Required input | Environment-variable values supplied by the CSM team |
Target portal | https://make.powerapps.com |
Outcome: The solution imports successfully into the intended Power Platform environment; the Sales Hub app contains a new group named SaaSify, and the Co-sell page is published and available when the app is played.
1. Roles and prerequisites
Developer | Provide the newly managed solution package each month. | Current package file and version/release identifier. |
CSM team | Provide the environment-variable values for the target customer/environment. | Confirm current values for every prompted variable. |
☐ Confirm the target customer and Power Platform environment name.
☐ Confirm the package is the current monthly release and is stored as a supported solution .zip file.
☐ Obtain all environment-variable values from the CSM team.
☐ Confirm there is no conflicting deployment already running in the target environment.
☐ Plan for at least 10 minutes of unattended import time, plus validation time.
Control point: Never guess environment-variable values. Kindly confirm from your SaaSify Customer Support team before completing the import.
2. Import the monthly solution package
Note: For monthly package updates, only the solution import and environment-variable update steps are required. The remaining Sales Hub configuration steps apply only when onboarding a new customer.
STEP 1 | Open the Power Apps maker portal
Go to https://make.powerapps.com and sign in with the authorized deployment account.
Use the environment selector in the upper-right area to choose the intended target environment.
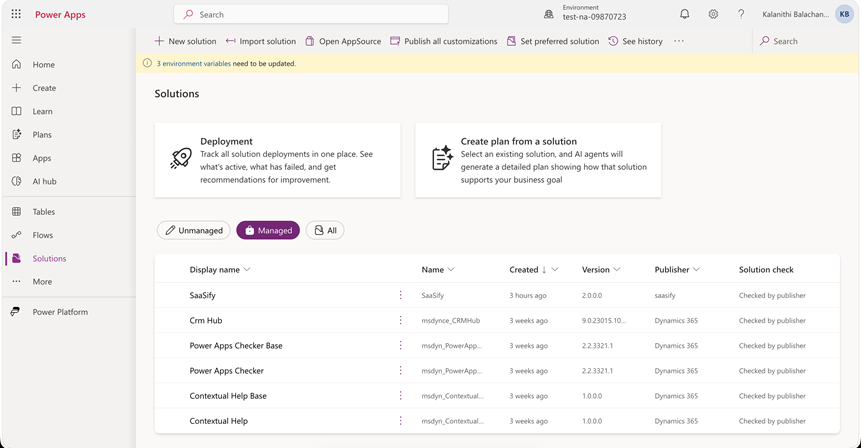
Verification: The target environment name shown in the portal matches the deployment request.
STEP 2 | Start the solution import
In the left navigation, select Solutions.
Select the Import solution, then browse and select the new monthly solution package provided by the developer.
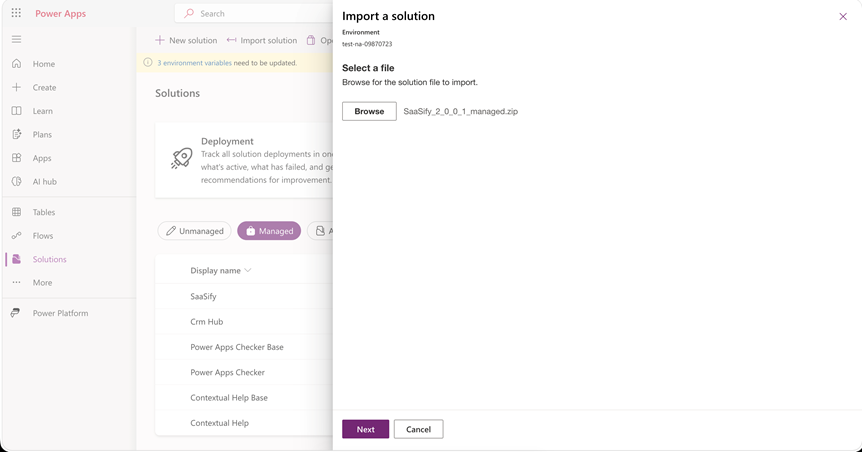
Select Next and review the package details before continuing.
For package updates: under Solution Action, choose Stage for Stage Upgrade.
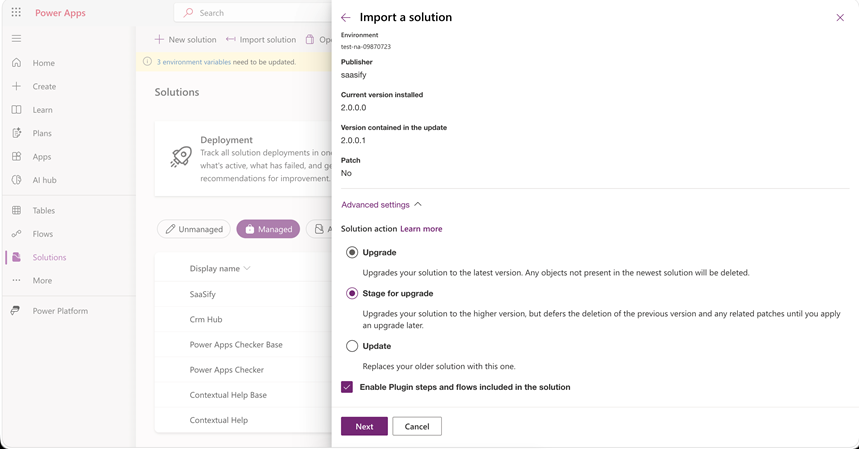
Verification: The package name and version match the current monthly release.
STEP 3 | Enter environment-variable values
On the environment-variable configuration screen, enter the values supplied by the CSM team.
Review each name and value carefully, then continue with the import.
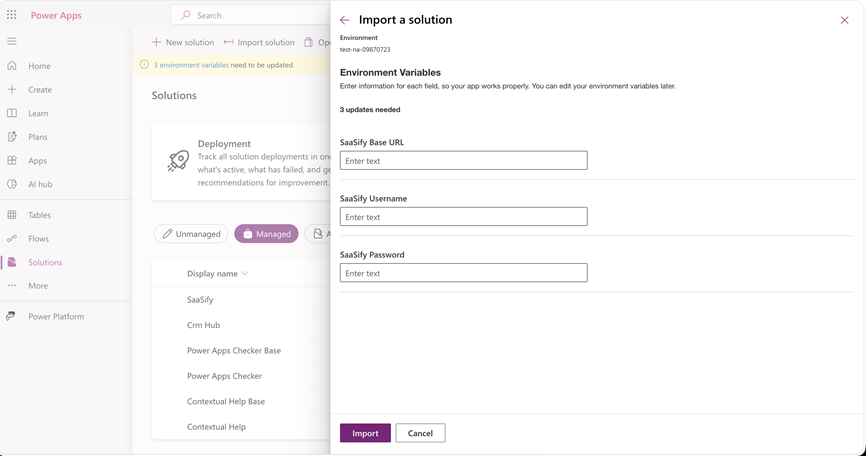
Important: Do not substitute values from another customer or environment unless the CSM team explicitly confirms them.
Verification: Every required environment variable has a confirmed value.
STEP 4 | Wait for the import to finish
Start the import and allow approximately 5–10 minutes for the solution to upload and install.
Keep the portal open and monitor the import notification or solution status.
Verification: The portal reports that the solution import was completed successfully. If it fails, capture the error details and do not proceed to app configuration.
3. Configure the environment
STEP 5 | Increase file attachment size
From the header, select the environment name.
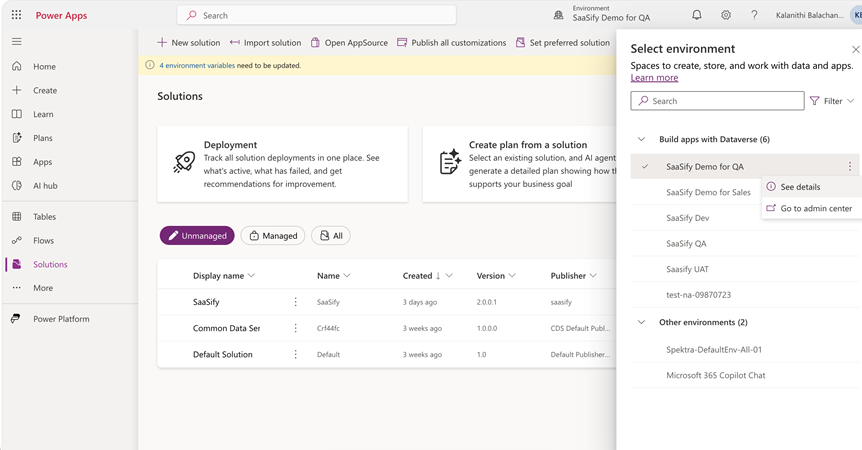
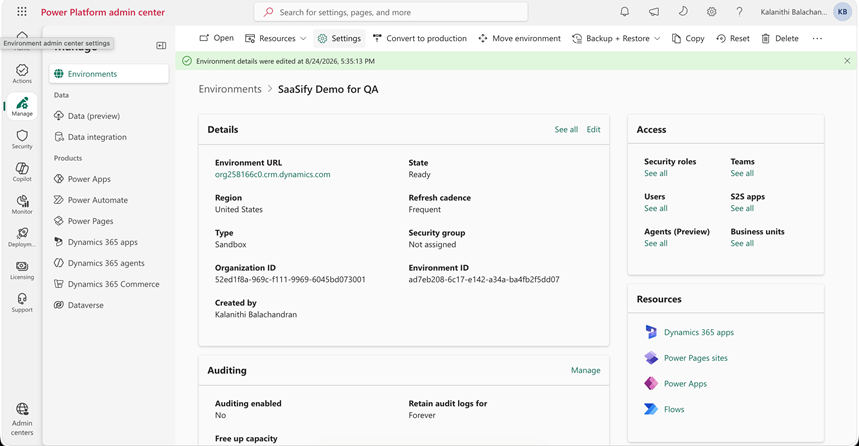
Hover over the selected environment, select See details, then select Go to the admin center.
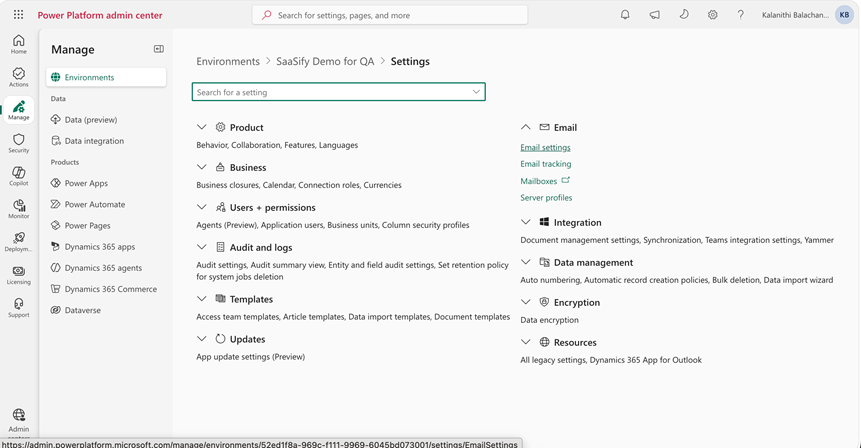
This opens the admin center. Select Settings.
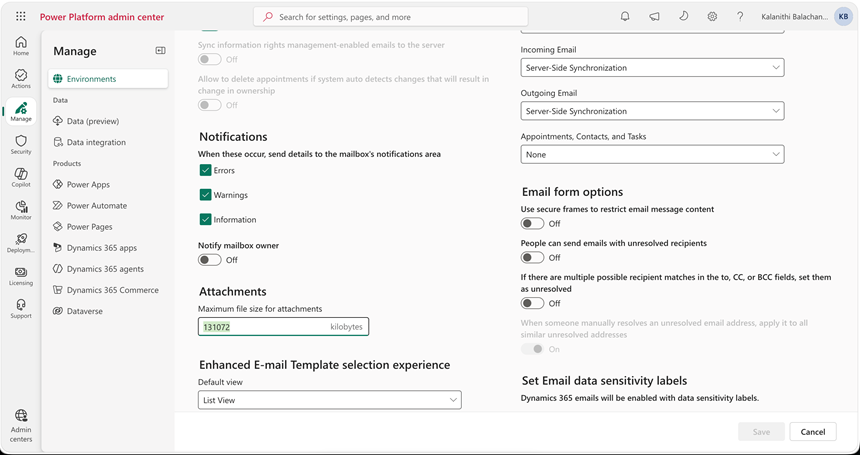
Once Settings open, select Email settings.
Update the attachment file size limit to 131072.
STEP 6 | Add application user
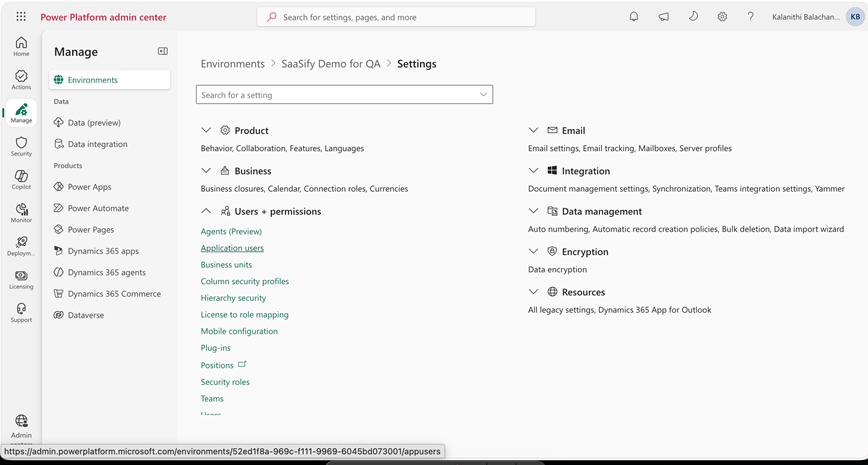
On the Settings page, under Users + permissions, select Application users.
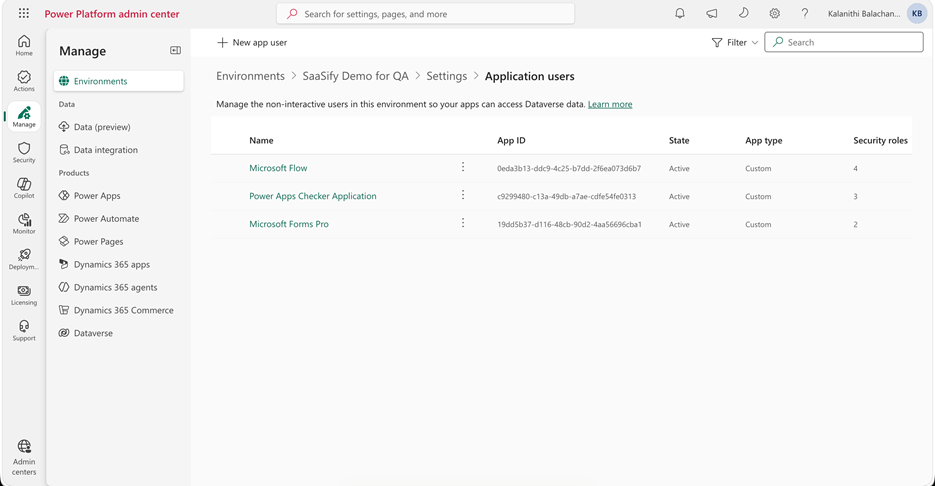
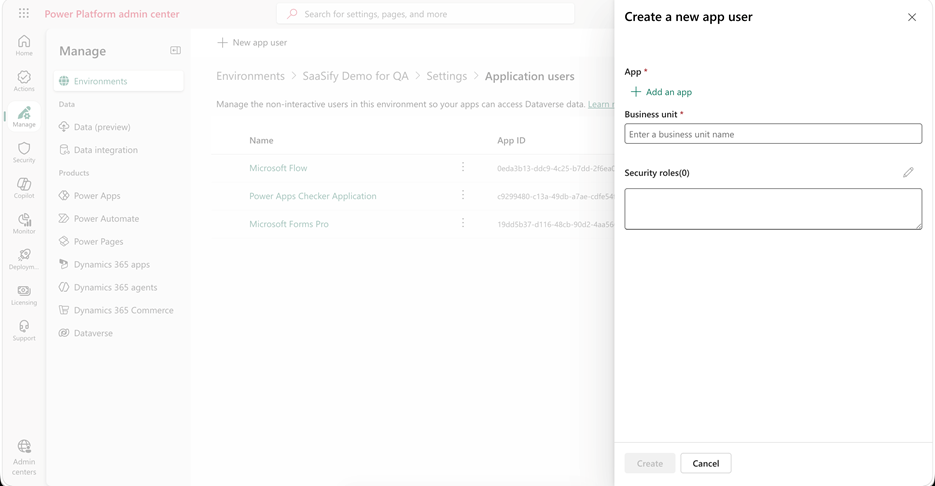
Select Add an app. In the search box, search for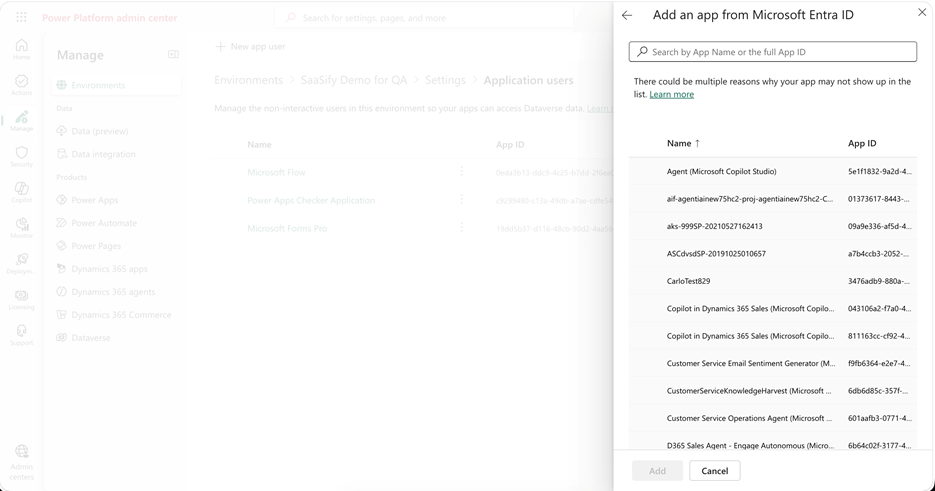
SaaSify - Private offer and Co-sell automation platform for Cloud Marketplaces and choose it.
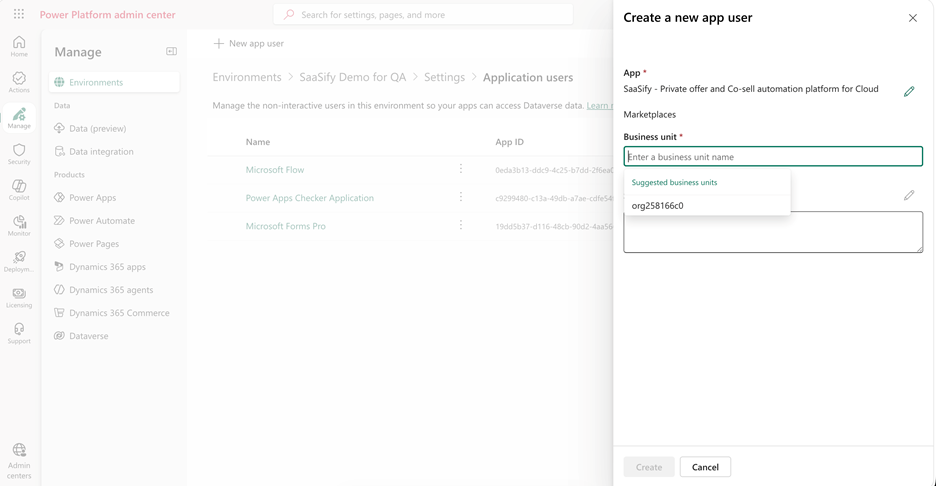
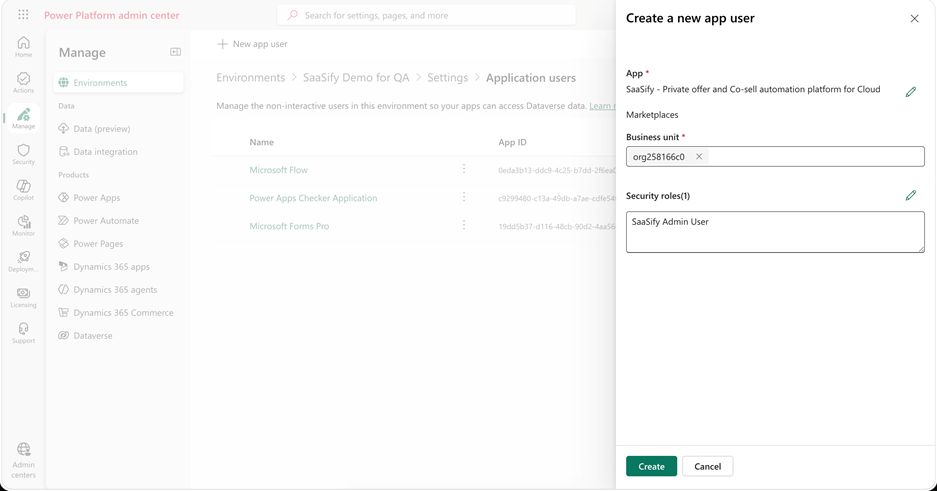
Business unit: choose the suggested unit.
Security role: click the edit icon, search for SaaSify Admin User, and add it.
4. Configure the Sales Hub app
STEP 7 | Open Sales Hub in the app designer
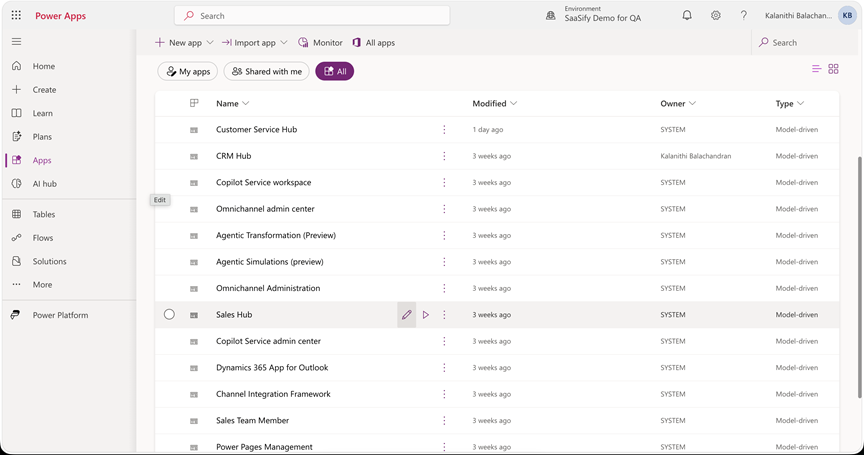
From the left navigation, select Apps.
Select All to display all available apps.
Locate Sales Hub, open its More commands menu, and select Edit.
Verification: The Sales Hub app opens in the app designer.
STEP 8 | Create the SaaSify group
In the app navigation editor, locate and hover over the Sales group.
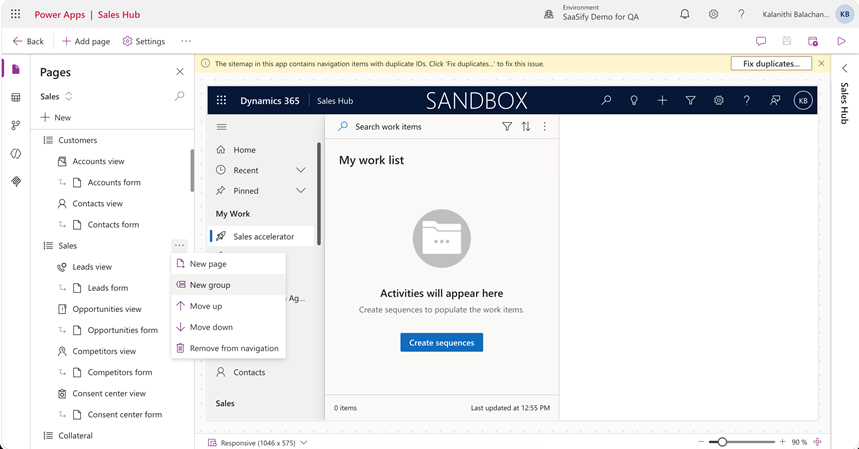
Select New group.
Enter SaaSify as the group name.
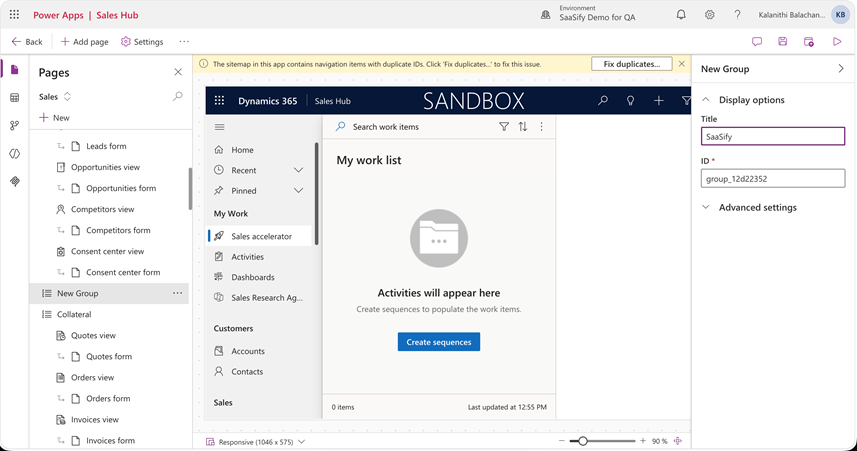
Verification: A group labeled SaaSify appears in the Sales Hub navigation.
STEP 9 | Add the Co-sell Dataverse table
Within the SaaSify group, select New Page
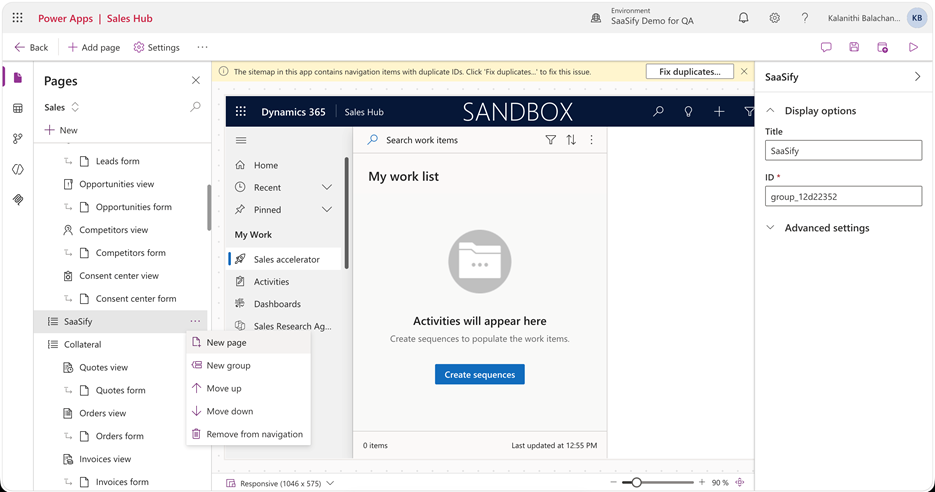
Choose Dataverse table as the page type.
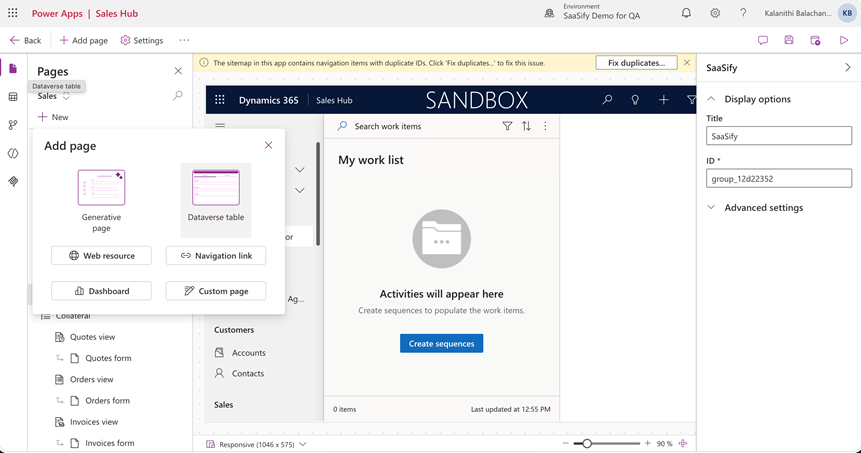
Search for Co-sell, select the matching table, and add it to the app.
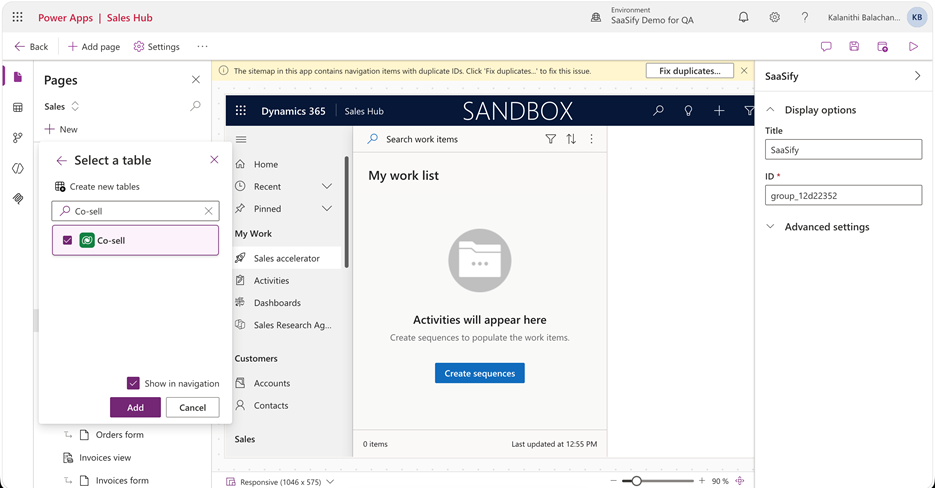
Important: If more than one similarly named table appears, confirm the correct table with the solution owner before selecting it.
Verification: The Co-sell page is listed under the SaaSify group.
STEP 10 | Publish and test
Save the app changes.
Select Publish and wait for the publish operation to complete.
Select Play to open the updated Sales Hub app.
Verification: In the running app, the SaaSify group is visible, and its Co-sell page opens successfully.
5. Integration via SaaSify
STEP 11 | Open SaaSify web portal
Navigate to the Power Apps admin center to get the Account URL and Organization ID.
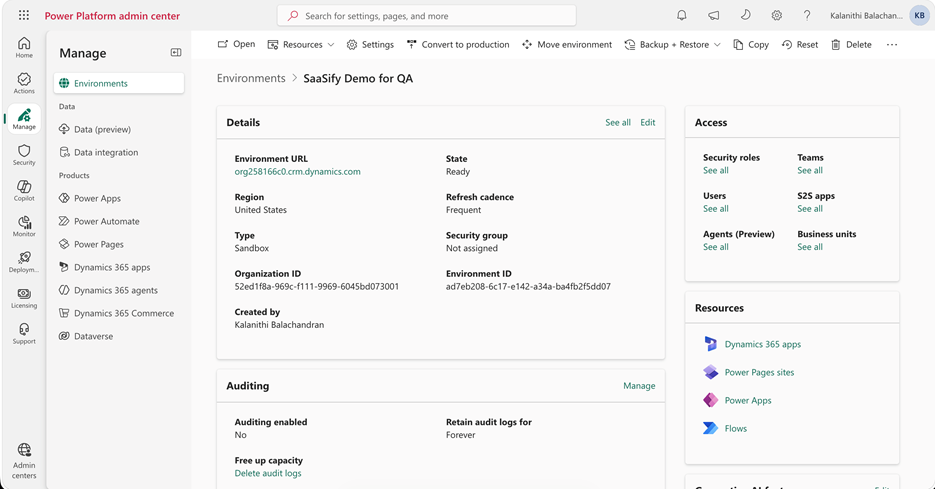
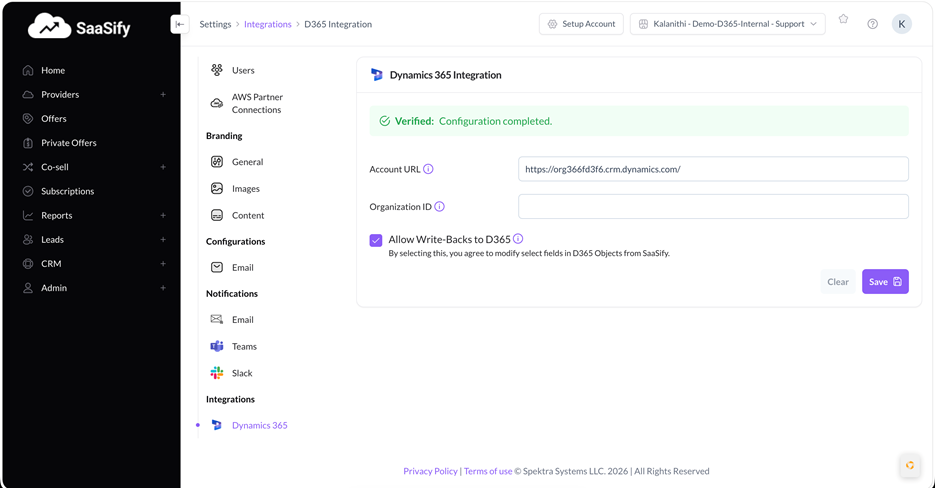
On the SaaSify web portal, navigate to the Integrations section, enter the Account URL and Organization URL, then save and validate.
6. Troubleshooting and escalation
Import remains in progress: Wait a few more minutes and refresh the Solutions view. Do not start a duplicate import while the first job may still be running.
Import fails: Capture the error message, timestamp, environment, solution name/version, and any downloadable log. Send these details to the developer or solution owner.
Environment variable is missing: Pause the deployment and request the correct value from the CSM team.
Sales Hub cannot be edited or published: Confirm the deployment account has the required maker and app customization permissions in the selected environment.
Co-sell table is not available: Confirm that the solution import succeeded and that the expected table is included in the imported package.
Final acceptance: Deployment is complete only after the solution shows a successful import status, and the published Sales Hub app displays SaaSify → Co-sell without an access or loading error.